… And all of a sudden Stowey Green is complete…

I have been taking advantage of the evenings and weekend running up to the Christmas holiday to work on the N Gauge ‘Stowey Green’ scenery. It was genuinely a surprise for me to see that during the Christmas holiday all was more or less done, and I could now actually run trains…..

.. So with just some basic tinkering to do to really finish things off I had better finish up (OK start ) detailing the story of ‘Stowey Greens’ scenery as currently ‘not detailed here -> Stowey Green – Scenery. And while I am at it I had better add some photographs…

Green and Pleasant Scenery arrives at Stowey Green

I have been having hours of fun with my scenery scatter to finally get rid of the ‘greyness’ of the Stowey Green landscape.
.. So, Finally ‘Stowey Green’ actually is … ‘Green’…

I have also added the powder blue ‘Sky Boards’ around the side which makes for a much better photograph.

The next job is to add trees and bushes etc to cover up the gaps in the removeable sections and finish off the ‘road space, around the main railway station and ‘goods yard’ area.
…. It is actually starting to look like a proper railway layout.

Distant Scenery at Stowey Green – and another track problem.

Now the Stowey Green ‘N’ gauge layout is properly out its time to crack on with the scenery.
.. I am in the process of working out where the road to the station will go and which cottages in my collection will be on it.

In the meantime I decided to unroll my printed scenery sheets and glue them to the back ‘sky board’ .. looking good so far

.. Once the road has been sorted out I can get on the hills and vales..

Just prior to this I decided to tackle an annoying track problem on the upper section.
After many attempts to make the track transition between the incline and the removeable upper board I could not remove a ‘step’ in the track which made either the locomotives or carriages ‘enthusiastically’ derail. So I decided that it had to go’..


I removed that ‘glued down’ section of track and added a new section of track that ‘bridged’ the gap – but ‘could’ be removed on the rare occasion I needed to remove the upper section. Now things run a LOT better.

I just need to work around it with the scenery to either hide or obscure the transition.

Extended OO and N Gauge Rolling Road

As promised in an earlier post, I have upgraded my rolling road so I can work in ‘OO’ and ‘N’ gauge.
.. Mostly to save space.

Here I am working with an old ‘OO’ Triang Hornby Class 37 and an ‘N’ GWR Pannier tank

Breathing new life into a broken Terrier

I have finally been able to catch up on a number of pending jobs on the ‘OO’ gage layout.
.. The first of these is some repair work on one of my locomotives.
My pretty little Weston Clevedon and Portishead Light railway Terrier loco has been behaving a bit too realistically of late giving out smoke after a minute or so running, and when it was running it was nowhere as sprightly as it should be

So – I have managed to get a replacement motor and had a go fitting it. The trickiest job was carefully stripping and re-soldering the very fine wire power feeds – 6 in total – 3 for each side

.. It was also a chance to try out my budget Rolling Road.
I am really impressed with it – not bad for £35

.. In fact I am so impressed I have ordered rollers so I can also use it on my ‘N’ gauge loco’s.

Dabbling in Narrow Gauge

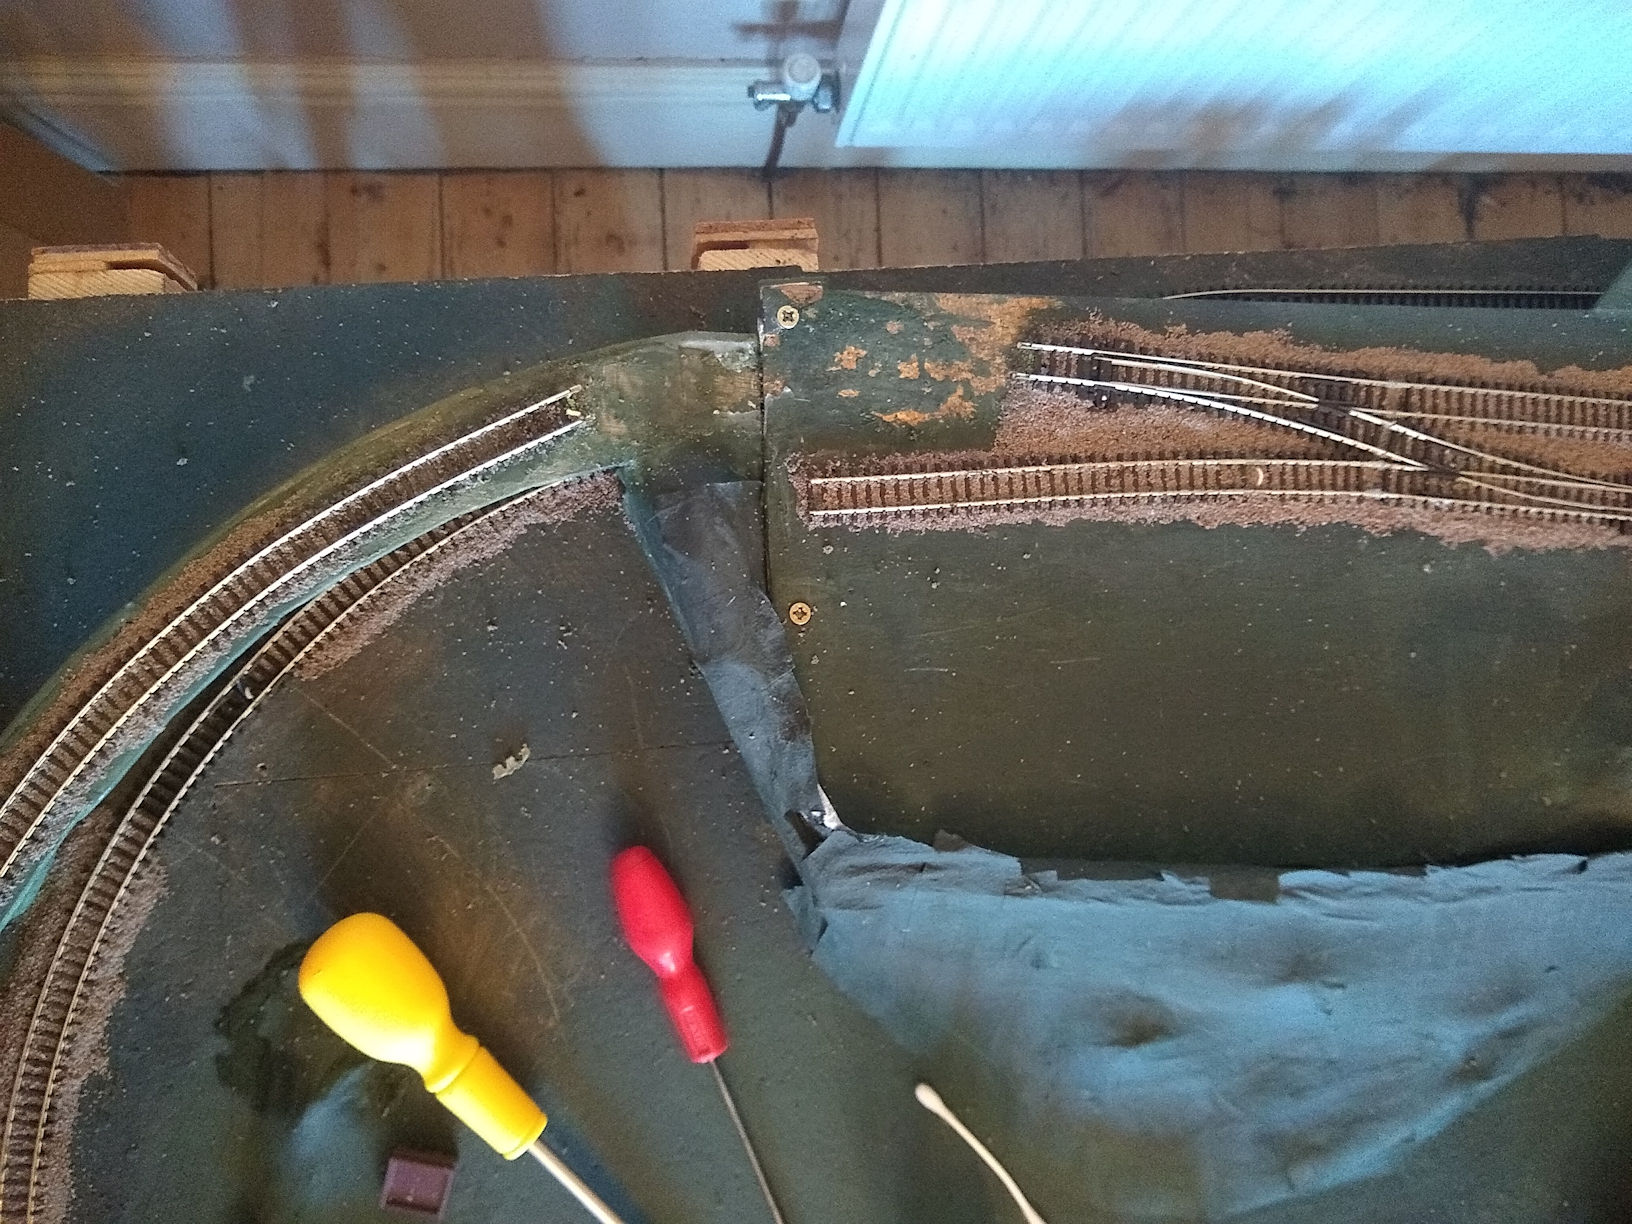
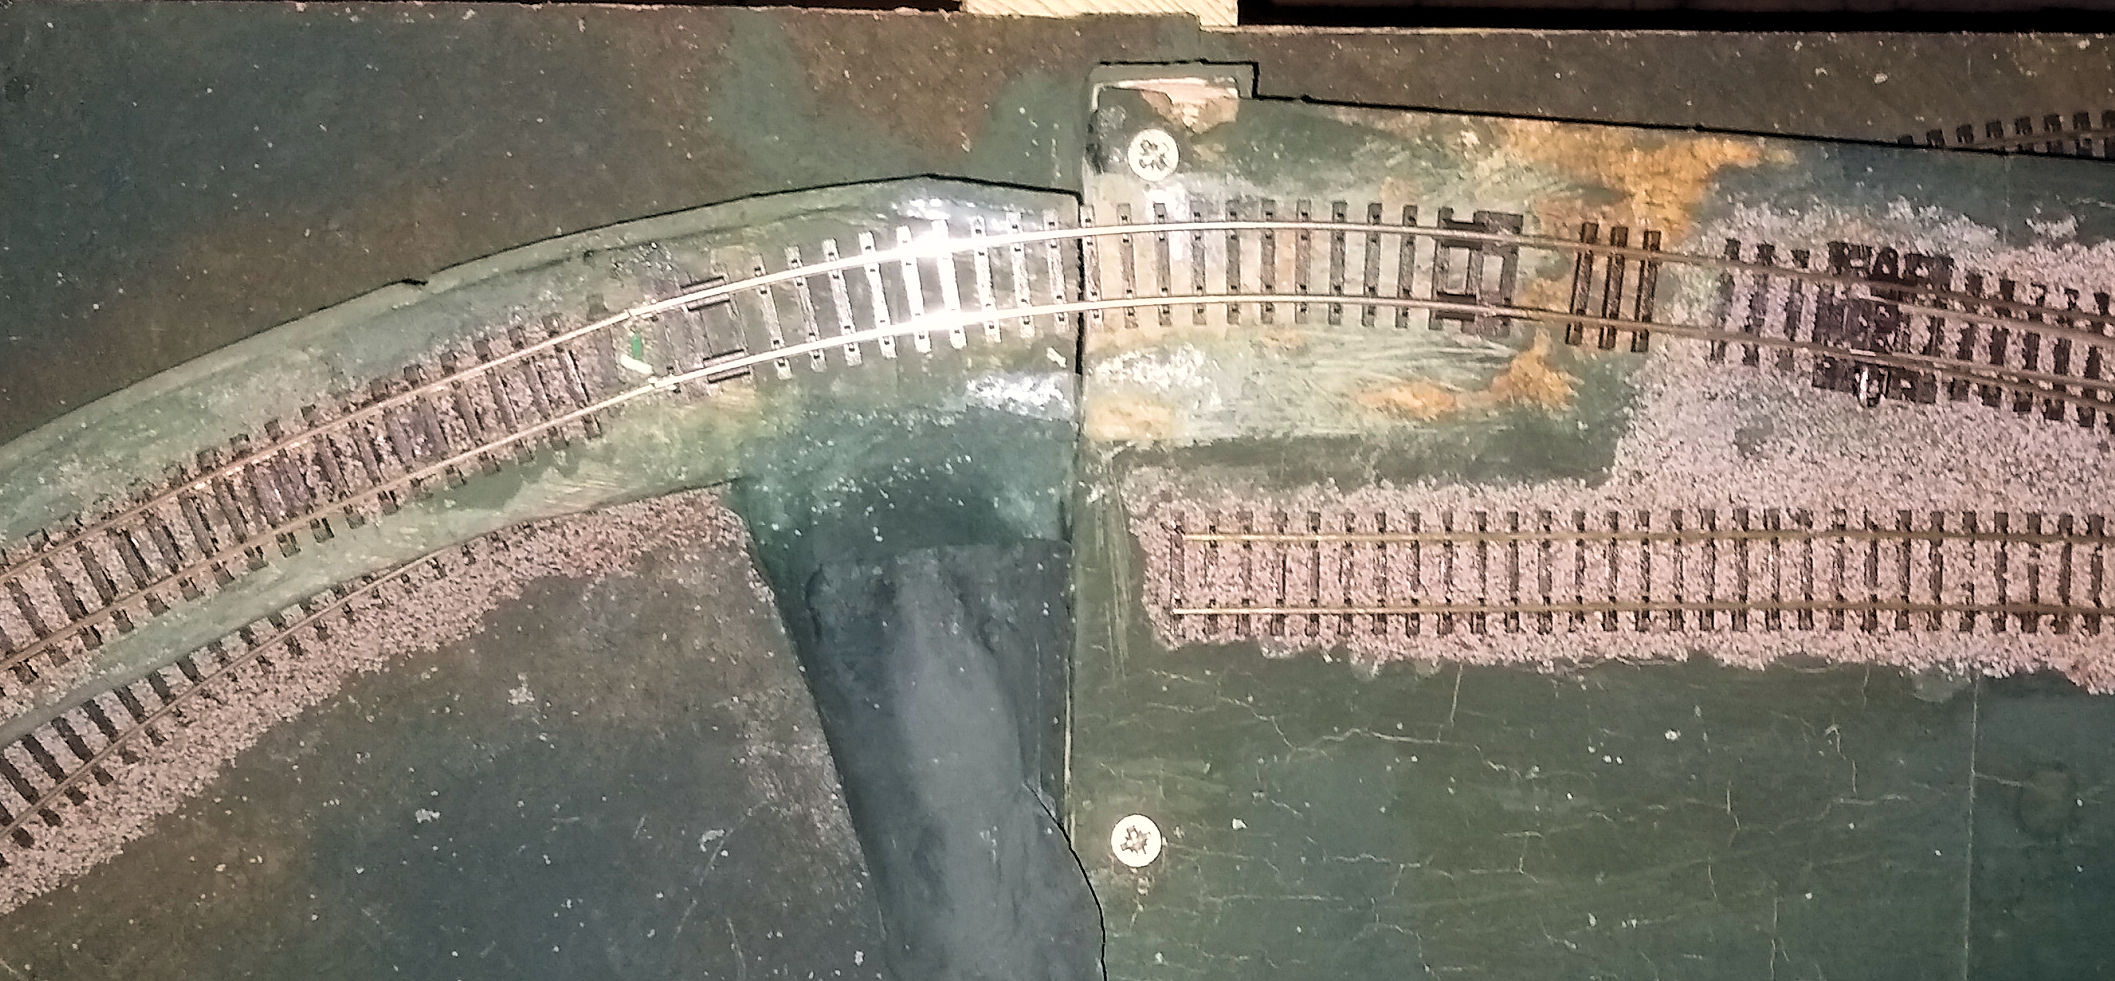
As has been covered in the ‘Whats New’ blog I have been busy tinkering a bit with OO9 Narrow gauge over the summer.
.. For all sorts of reasons work on Burton Pheonix and Stowey Green has slowed, so it has been good to have something to keep me busy.

Up here in North Wales we are close to the famous ‘Little Trains of North Wales’ that were built for quarry work – particularly slate.

This has become particularity relevant for me as we have friends that are now living within the new Word Heritage Site that covers the North Wales Slate industry. In fact the path of the Gorseddau Tramway, which served the Gorseddau Slate Quarry, ran through their garden.

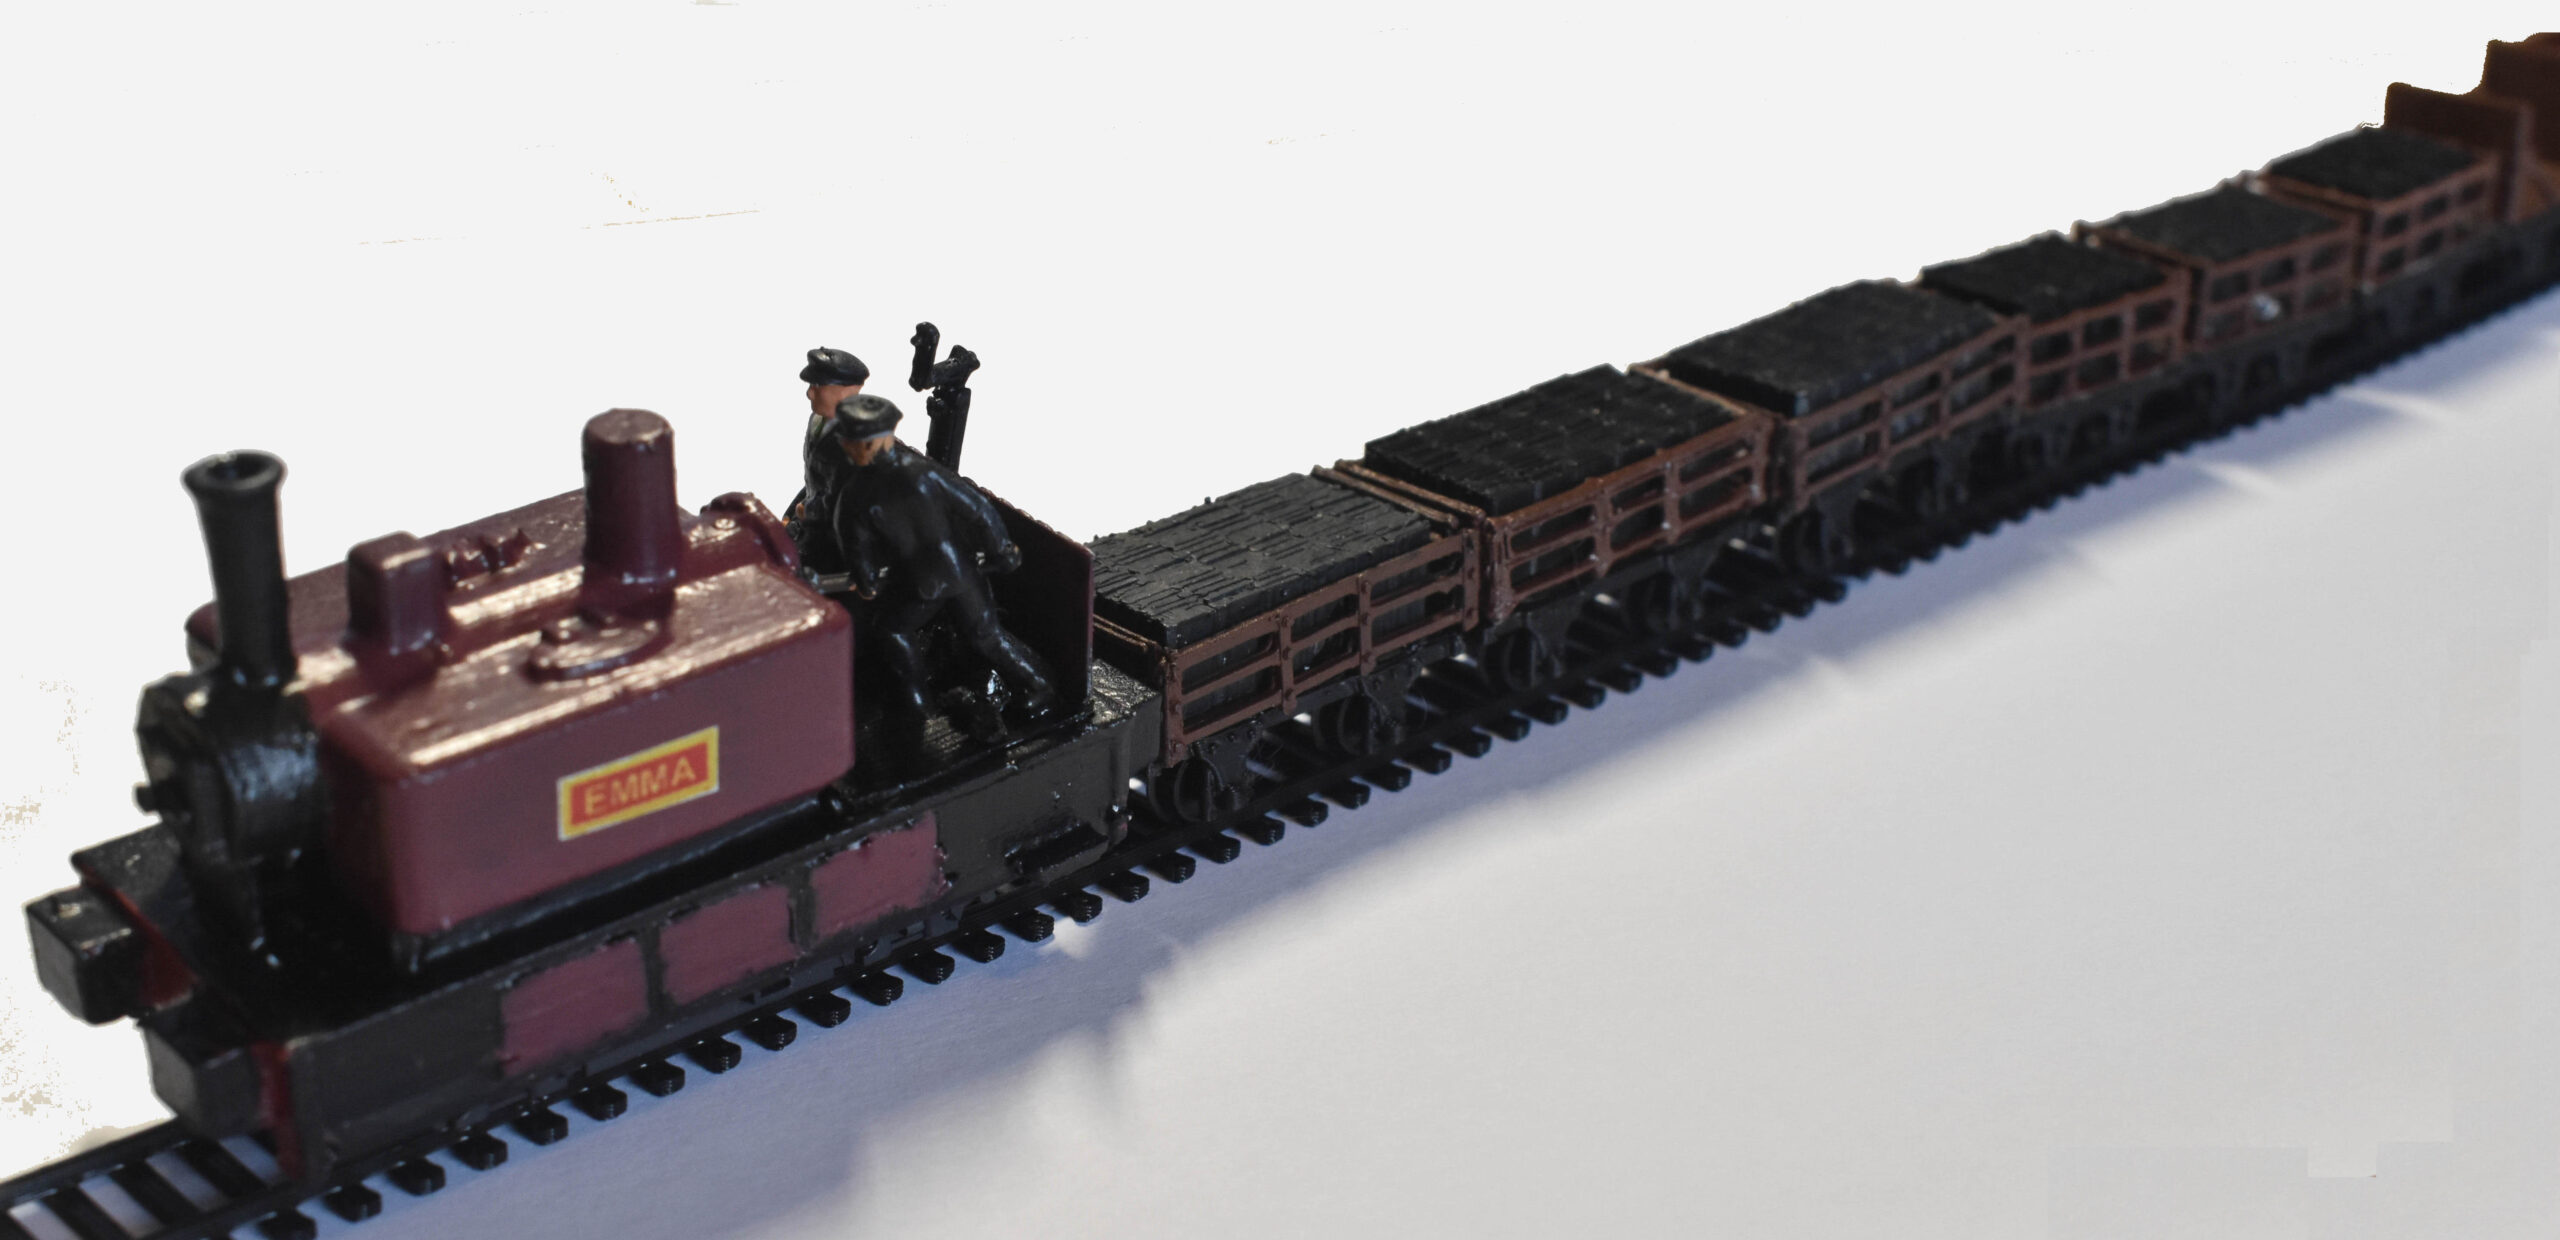
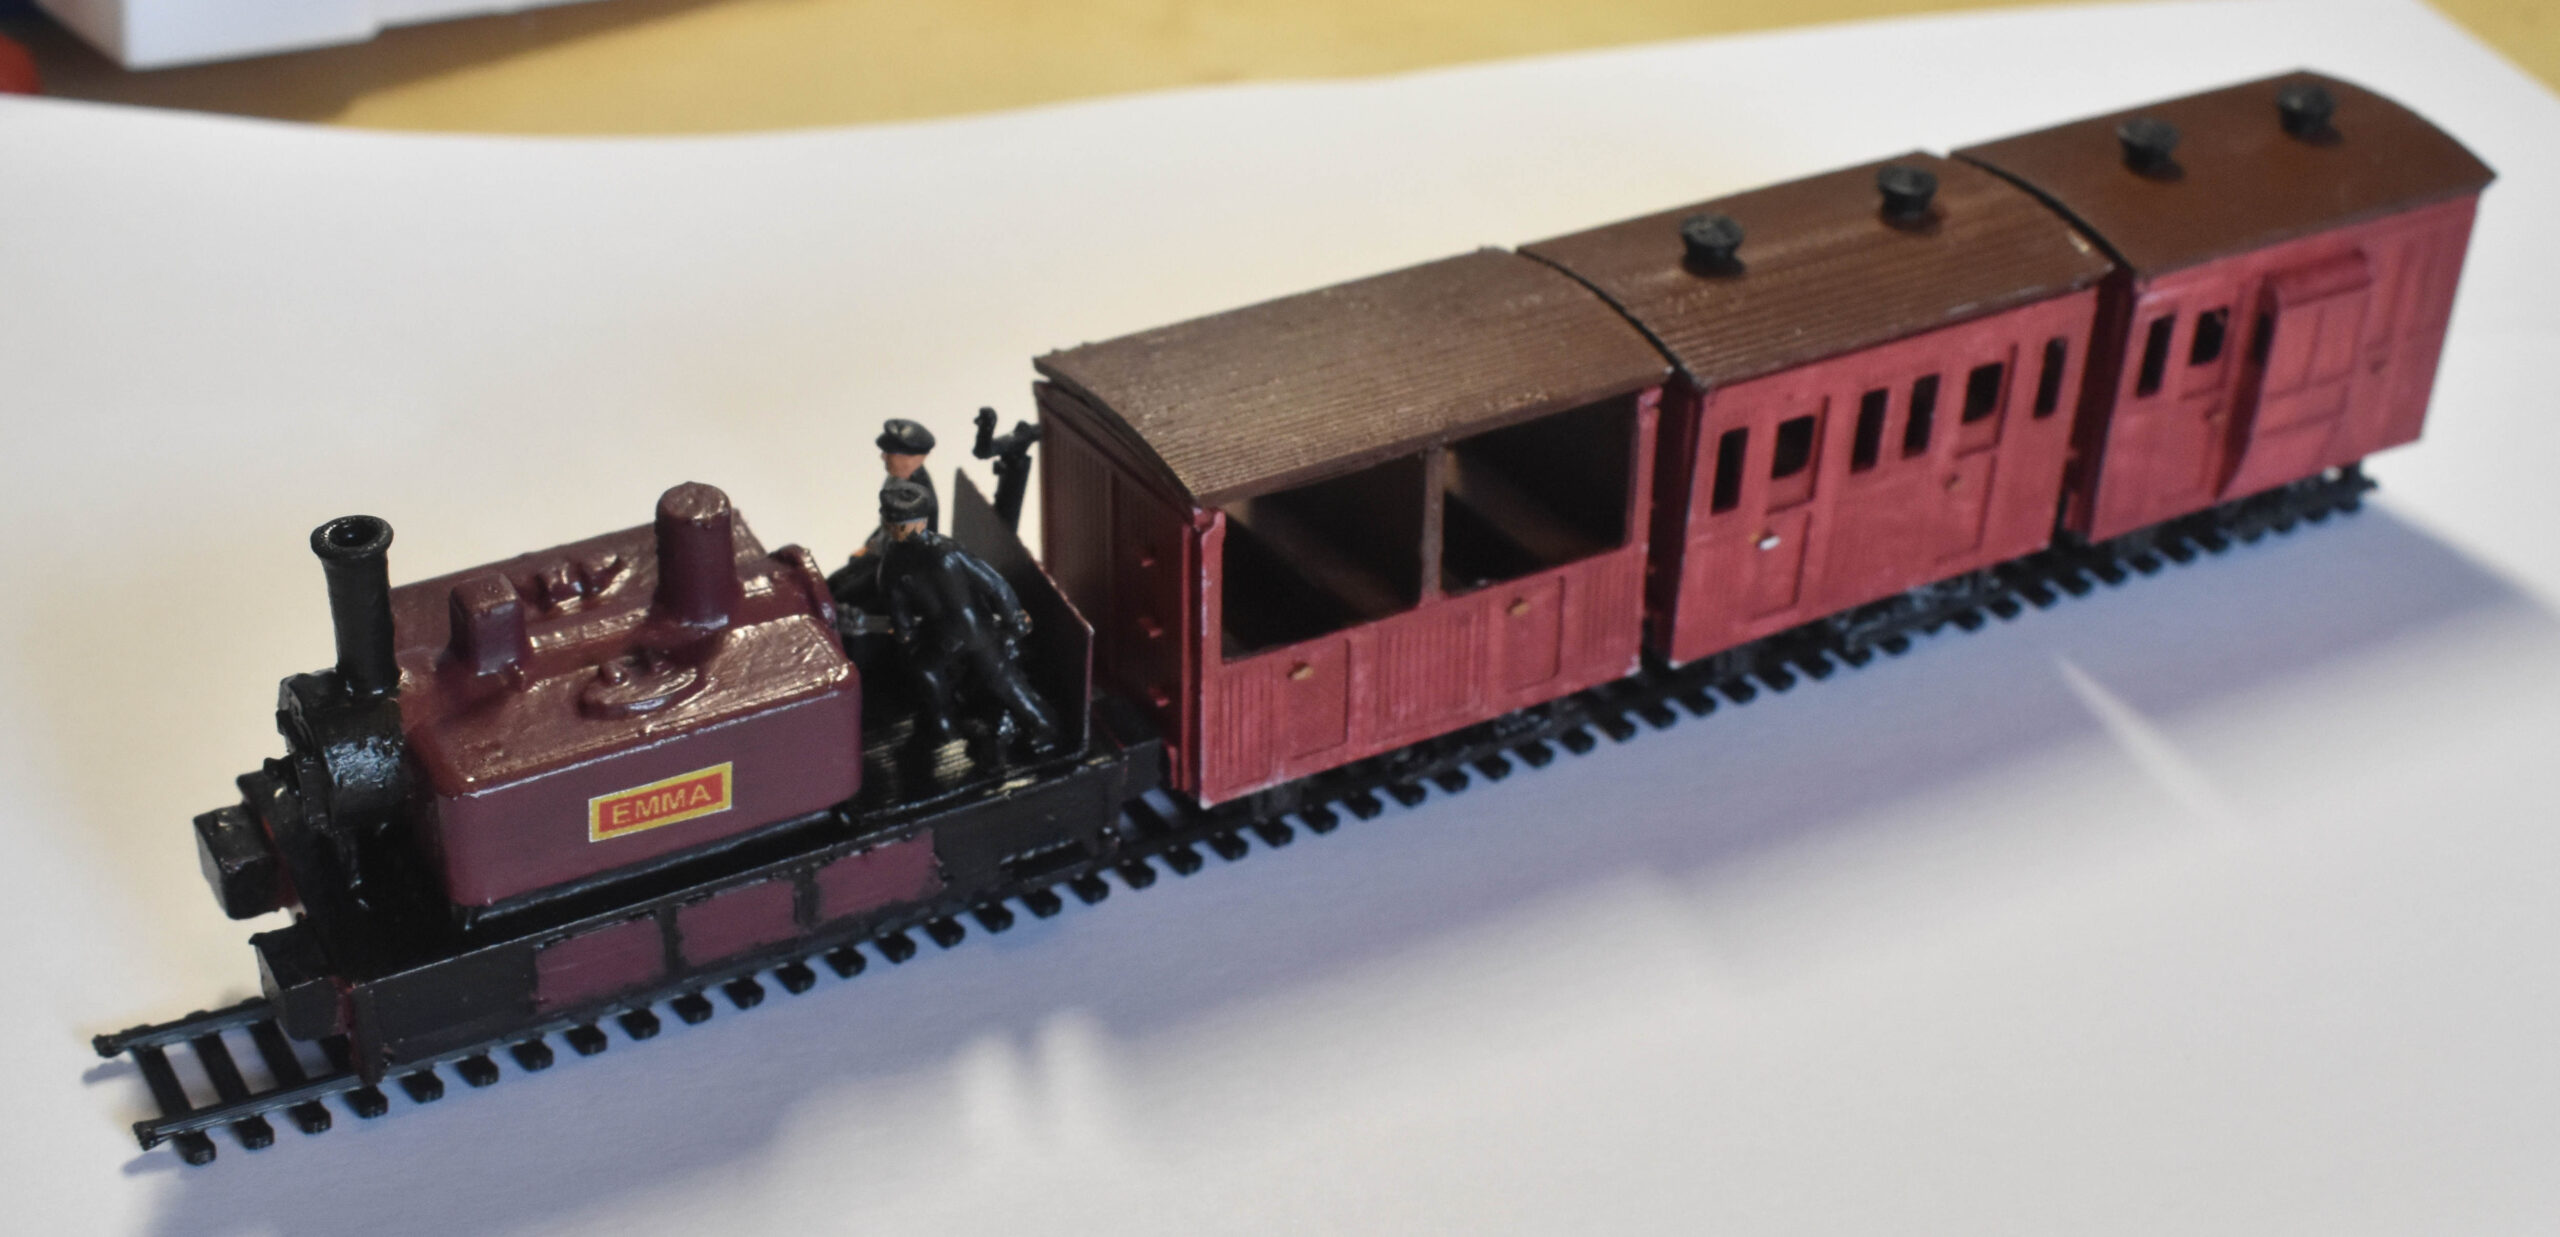
Using the 3D Printer, and so far inadequete relearnt skills in painting… I have been able to create some OO9 rolling stock.
.. So far I have a little locomotive ‘Emma’, powered by a Kato chassis, along with a good variety of Slate and general support wagons. I have even made a few passenger carriages.


.. The ‘final’ intention, egged on by my friend, is eventually to create one (or more?) De Winton vertical boiler locomotives.
These locomotives were nick named ‘Coffee Pots’ – as can be seen below …
DeWinton
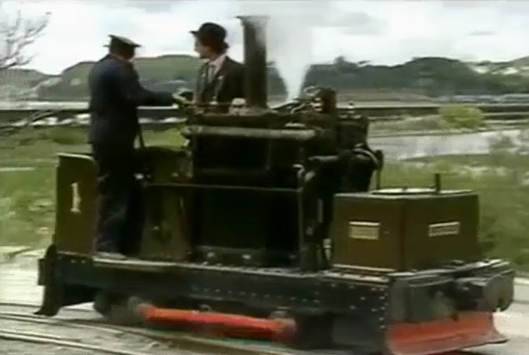
These locomotives were locally built in Caernarfon especially for use on the North Wales slate mines.
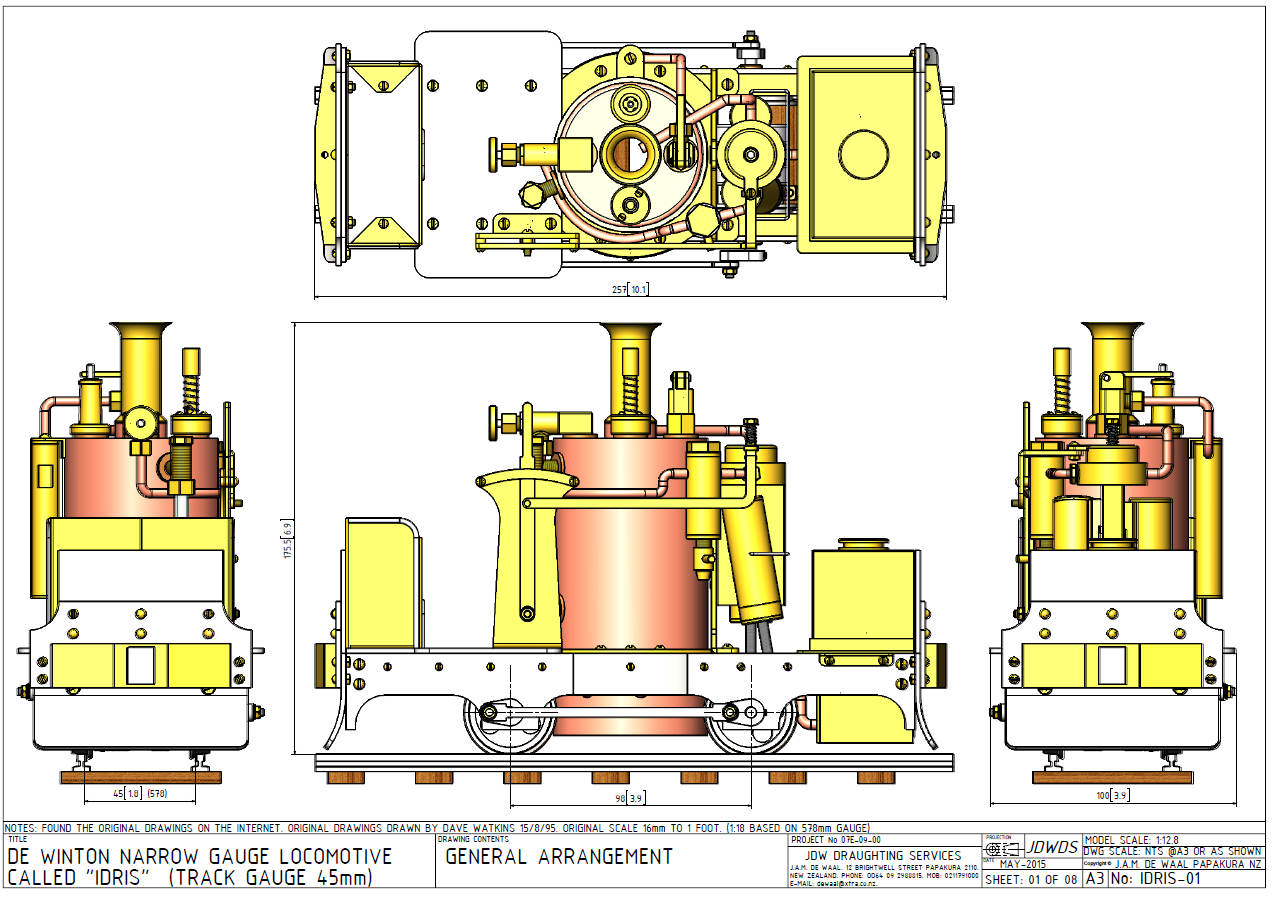
I have some interesting drawings which hopefully mean that when I get up to speed in CAD I ‘can’ produce a 3D model that can be printed..

DeWinton Drawing
A proper winters evening project I think.
.. Especially since Peco, due the stresses of the current pandemic, are still to release the medium radius bullhead points that will be a key component of the new Burton Crumpnold layout.. So plenty to get involved with in the meantime….

Finally finished the Burton Phoenix ‘scenic corner’

Almost 2 years after it was started the Burton Phoenix corner addon is ‘complete’.

All this is really thanks to the 3D printer. I have ‘printed’ the boats including oars etc, jetty and the tents.

After giving the canal boats an initial paint I discovered that you can get laser/inkjet printed water slide transfers. So here they are on the Narrow Boats ‘Chez Câmilla’ and ‘KingFisher’. These allow for far more detail than my current painting skills allow for.

I have also undertaken an improvement to the scenic look scenery. It has all all been ‘greened’ up – so everything looks green and pleasant… rather than a sun scorched desert

….. for a contrast you just have to see the previous post…. (Or Here… )

3D Boats at Burton Phoenix

Finally, after a number of months since it’s arrival, I have completed the original 3D Printer project for Burton Phoenix.

This ‘project’ came about because I could not find suitable Canal Boats and small rowing boats etc for the layout. This was not helped by the tightness of the bend on the river, plus no Model Railway shows to visit where I have tended to find these kind of things.. This was the final push I needed in getting me to try put 3D printing for model railways.

So I managed to find a number of suitable 3D models and printed my own. It has taken quite a while to get the best out of the 3D printer especially for the smaller items (oars and sawhorse stands etc).
Now I feel comfortable with what I could 3D print reliably and accurately, it is now time to tackle the whole process of finishing and painting the 3D prints….

The last time I did painting like this was with Airfix models and that was too many decades ago..

… I have a long way to go but am pleased with my first results.

So.. I have added a small boat jetty to the ‘River corner’ of Burton Phoenix – I will find some people to put into the boats to give it a bit of life. I am also going to try using printable water slide transfers on the Canal boats to make them look more realistic…

For some context the boats started out like this ….. all in shiny white PLA plastic….


Now to work out what to do this side of the river. .. My current thoughts are maybe a campsite?
.. And maybe make things a bit greener!!

2021 at Stowey Green

Now all the track is laid to the rolling stock’s satisfaction this is the current state of Stowey Green.

I have built a scenic ‘back board’ and have scenic art work to add to it.

Now it’s time to add the station access roadway in – and give the landscape a bit of colour.

More Stowey Green Track Issues

I noticed that some of my longer wheelbase locomotives were struggling at one end of the upper board..
Caused by the classic flexible track ‘dog leg’ effect where the curve is to tight..

So it was back out with my steamer to unballast the offending track..

As before I dealt with the problem by using a spare piece of peco set-track.
.. I also decided not to cut the track between the boards as it give a smother run for the locos.

I will probably ballast the track on the upper board (right side) but leave the left clear so I just unhook at the fishplates should I need to remove the upper board for any reason.