09/02/2015 ‘We have just recently moved to North Wales, hence no updates for the last few months’..
The room where the layout will be located is currently being used as a ‘storeroom’ whilst the kitchen is being redone – so it will be a while before ‘Proper’ model railway work can resume..
23/09/2015 Great moment in our new home.. Finally dusted off and assembled Burton Phoenix in a room that now has space to run it. I also indulged in my first railway purchase for quite a while – A Heljan ‘Park Royal’ Railbus. I particularly wanted one of these as we used to live near the site in North London. .. After testing the layout electrics with good ol ‘Smokey Joe’ here is the new Railbus in action.
.. But again ‘Life’ and the challenges on working on a large House that is more of a ‘project’ kept me away from railways…
09/02/2015 We have just recently moved to North Wales, hence no updates for the last few months…
The room where the layout will be located is currently being used as a ‘storeroom’ whilst the kitchen is being redone – so it will be a while before ‘Proper’ model railway work can resume..
23/09/2015 Great moment in our new home.. Finally dusted off and assembled Burton Phoenix in a room that now has space to run it. I also indulged in my first railway purchase for quite a while – A Heljan ‘Park Royal’ Railbus. I particularly wanted one of these as we used to live near the site in North London. .. After testing the layout electrics with good ol ‘Smokey Joe’ here is the new Railbus in action.
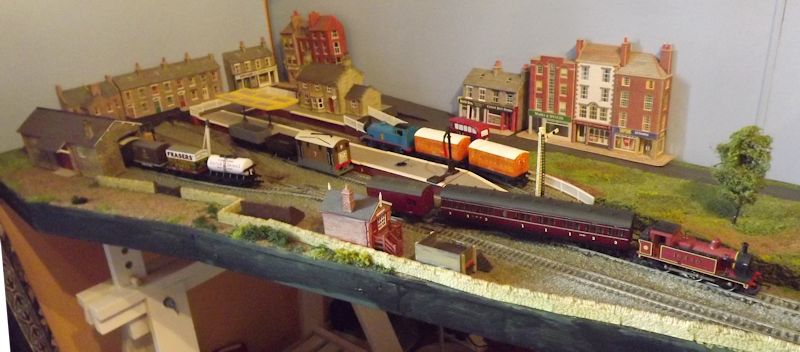
Burton Phoenix was ‘Redeployed’ into our Dining room to allow easy access to the front of the layout. It has also allowed me to take a single photograph of the layout end to end. The Railway room was long long enough to put all sections up.
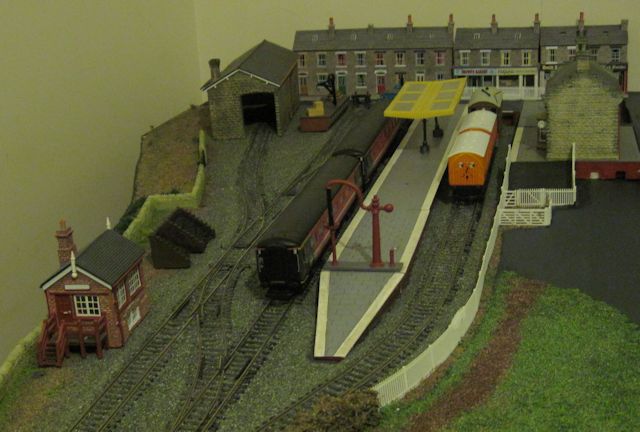
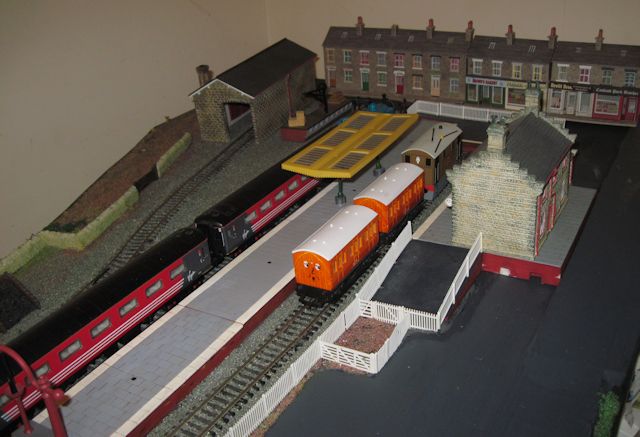
This is a view of the station end of the layout.
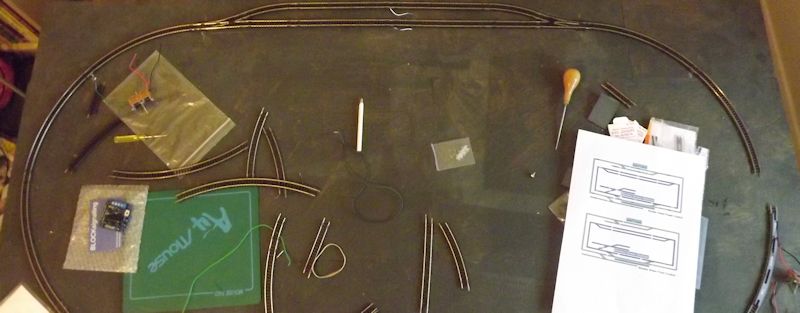
Now I have some space in the ‘Railway Room’ I have started work on the N Gauge ‘Stowey Green’ Layout.
As this is my first ‘N’ gauge project I have started at the ‘hidden’ end. I am in the processes of powering up the lower rear loop and positioning the point motors for it.
… THEN EVERYTHING CHANGED – I CHANGED JOB & MOVED HOUSE and the Trains and Layouts were packed away…
27/04/2014 For the last few weeks I have had Burton Phoenix up in our Dining Room so I can finish off the ‘Front of the layout’. It has also given me the first opportunity to take an ‘End to End’ photograph.
Work has restarted on Stowey Green, the N Gauge layout. As this is my first real go with ‘N’ and flexible track I decided to start from the ‘unseen’ side (the back).
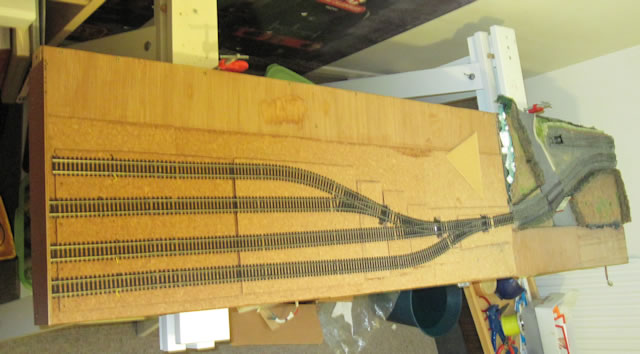
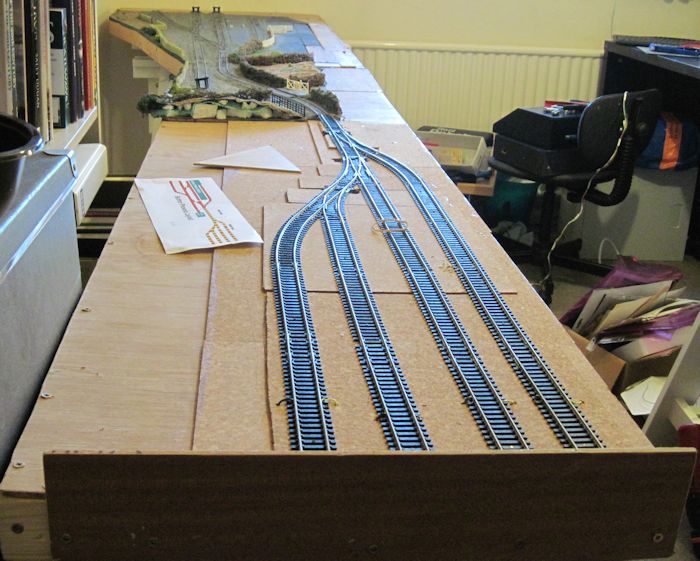
Burton Phoenix uses the Upper Station and small scenery sections of the original Burton Crumpnold layout. All that was missing is a track section to run into. To add usability I decoded to make a ‘Fiddle Yard’ comprising a number of sidings to run trains to and from. The following photograph shows the ‘bare’ fiddle yard attached to the scenery board.
30/05/2013 Work has been continuing on the Burton Phoenix where I have finalised the track positions of the fiddle yard and fitted the point motors, rescued from Burton Crumpnold.
Next comes the wiring, which is the major task needed for the is layout, as I have to adapt the wiring loom for the old station board to work with a new plug/socket fitted to the board. In addition I need a simple way to connect the other 2 boards to a new control panel. The current schematic for Burton Phoenix is shown below, showing the power section ‘cab control’ control over the 3 boards.
27/10/2013 I have wired up all the boards for Burton Phoenix. All the track sections and point motors are wired and ready to be connected to the power and control ‘circuits’ using 25way DSub connectors., recycled from the original layout..
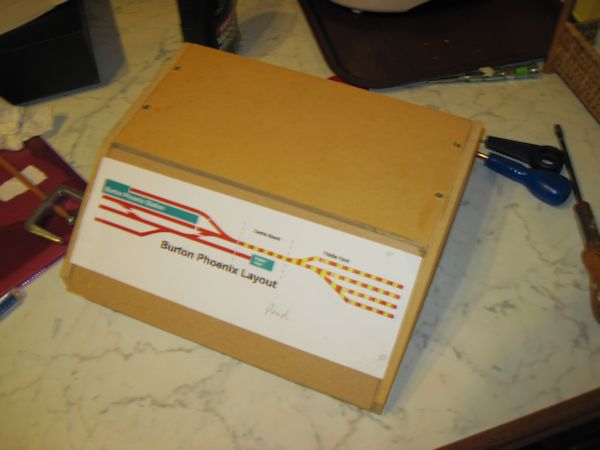
Now everything is wired it was time to build the control panel for it.
,
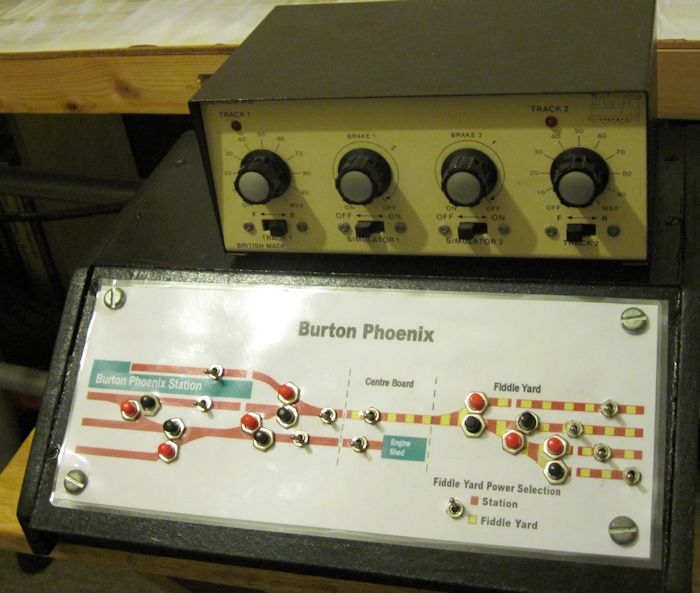
The Burton Phoenix control panel is built out of off-cuts of MDF and with a screw on Hardboard panel with a laminated diagram. The idea with the design of the control box is that my Gaugemaster twin controller sits on top with the ‘cab control’ power selection and and point control switches operate from a ‘Mimic’ diagram on the front. The ‘Mimic’ panel selection are fed to the layout from sockets at the back of the box.
…Now the control box is ‘built’ the next stage is to get the soldering iron back out and wire up the control panel and fit all the switches. Then it will be time to make up the connecting cables between the control box and the layout sections… ….And then maybe we can have a go running some trains…
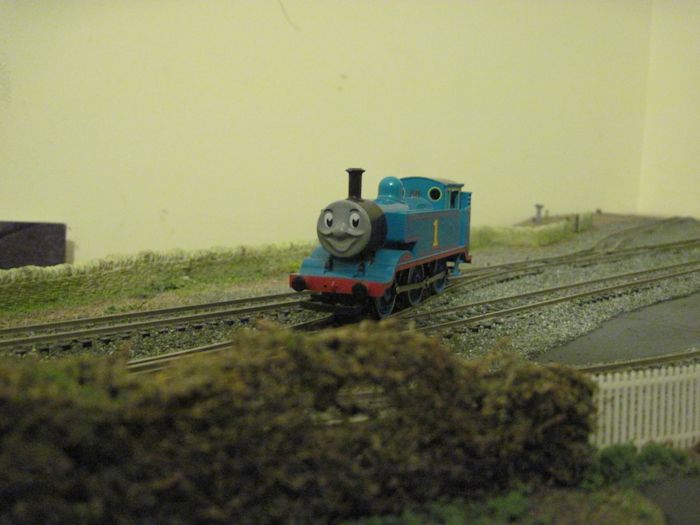
08/12/2013 Today I managed to test the new Burton Phoenix control panel and layout wiring… BY ACTUALLY MANGING TO RUN AN ENGINE… The first time I have been able to run a ‘OO’ gauge loco for an embarrassing 5 years…
I chose Thomas for this grand adventure – as it was the first tank engine to hand. His mission was to ensure all the ‘Cab Control’ power sections and the point switches all worked. After spending the last few days wiring up the box and making up the connections cables to the layout I was pleased to find only a couple of minor issues to sort out
Here is the completed Control Panel – Painted and ‘Wired up’ – complete with the controller
This is also the first time that the complete ‘End to End’ layout was put together… Now to add the scenery to ‘Hide’ the fiddle yard..
30/12/2013 Just before the year end – and as promised to my friends at AAR Models. Burton Phoenix is Running. Admittedly there are a number of small scenery jobs to do… but that is mostly tweaking.
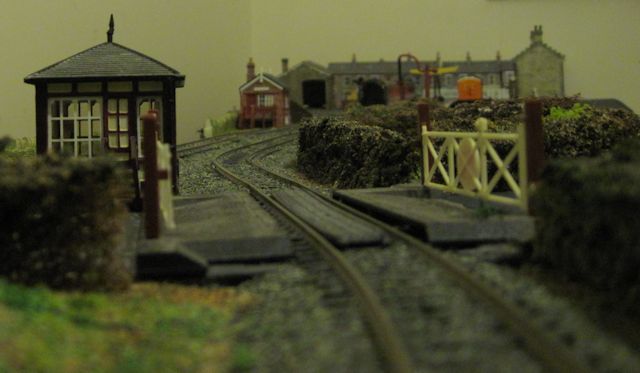
Here are a couple of views of the Station..
…The reason Thomas is pulling a couple of Virgin Mk2’s – hardly appropriate for the Logo.. or the layout is to check for clearances in the station and the tunnel mouth to the fiddle yard…
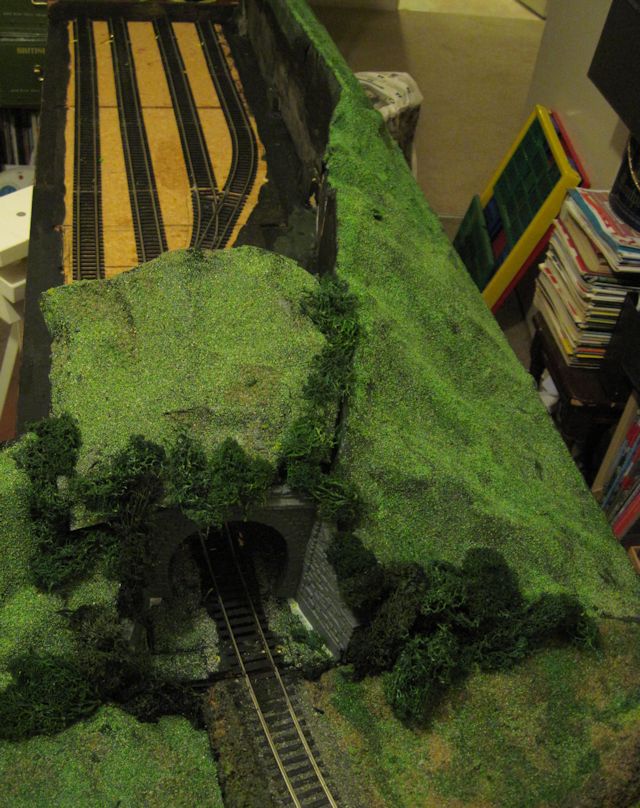
… As you can see I’ve a tiny bit to do to cover up the joins in the hill over the tunnel (which hides the fiddle yard).
Finally a view from the tunnel along the whole scenic area to the station..
30/05/2013 .. So three and a half years later where does that put me…
For all sorts of reasons, everything stayed ‘packed’ away – even the N gauge bits…. But is has started to change. I’ve spent the last couple of weeks ‘rediscovering’ where I got to, and even reminding myself what I have.
The priority will be the N Gauge ‘Stowey Green’ layout going initially as far and the lower level. Then I will then tackle the Burton Phoenix end to end ‘OO’ layout. As proof of this I have added a couple of photographs on the Work In Progress page showing the restarted work.
I have also created basic pages to cover the progress and the stock of the ‘Stowey Green’ layout.
27/10/2013 Another change of plan – decided to switch my energies to the Burton Phoenix end to end ‘OO’ layout, this needs much less work to get it going and will help me to ‘relearn’ my soldering and wiring skills. Plus it means I will have a working layout sooner.
08/12/2013 Today I managed to run a loco on Burton Phoenix whilst I was checking out the layout wiring and the new control box.I have added the most recent work and added a few photographs on the Work In Progress page.
30/12/2013 Burton Phoenix is Complete!! (More or Less).. .. Yes there are still jobs to do in tweaking and improving the scenery… but that is the normal routine of running/maintaining a layout.
22/11/2009 The extension has been built and normal life is resuming in our household.
Whilst I was packing up Burton Crumpnold I had an idea for another project to run alongside Burton Phoenix with no space for a large ‘OO’ layout for a year or two.
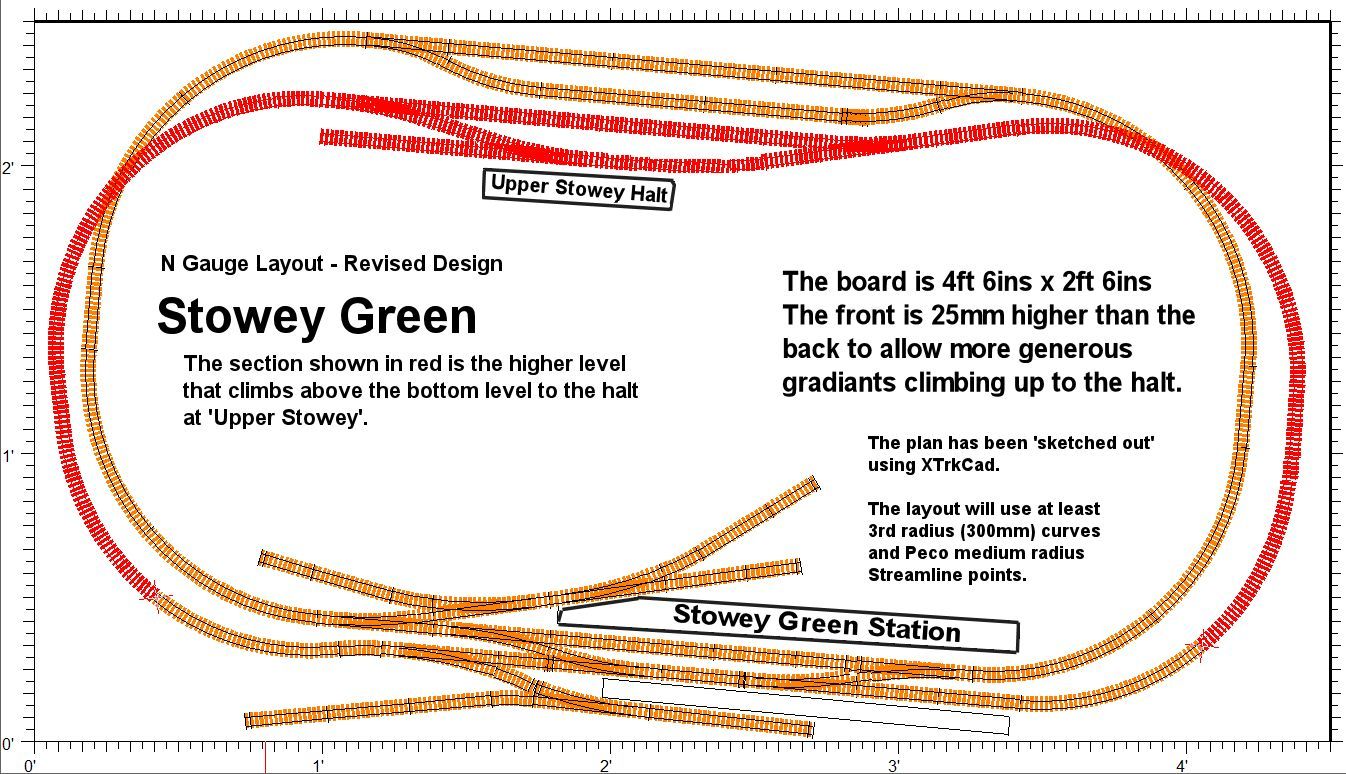
It is a small( 4ft 6ins x 2ft 6ins) GWR ‘N’ Gauge layout ‘Stowey Green’, this is a fictitious location in Somerset, close to the Somerset & Dorset line which would allow the occasional LMS ‘ visitor’…
Here is the initial ‘sketch design’ of the layout.
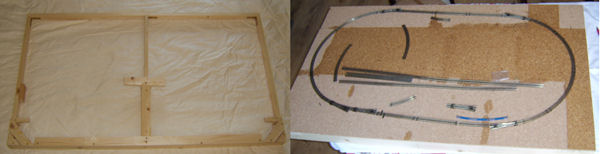
It is a twin loop design with a low level oval and a second oval that climbs to a small upper station and then descends back to the lower one. In order to keep the gradients reasonable the baseboard has been built so it is 30mm higher at the front than at the back.
The baseboard was been build from the usual 2x1inch timber with a plywood top. The top has been covered with cork to help deaden the sound.
I have a basic design in place for the ‘N’ Gauge layout – Stowey Green. .. As an LMS man married to a GWR Wife, I was drawn to the area of the Somerset and Dorset Joint Railway (SDJR) (Somerset and Dorset Joint Railway – Wiki Page) .. This railway was run by the GWR and LMS so gives a great opportunity/excuse of seeing GWR and LMS traffic together.
I chose as the village of Neither Stowey, an attractive Somerset Village near Bridgewater as a ‘location’, on a potential route that could have beeen used to connect Bridgewater to Minehead. So I gave the new station the name ‘Stowey Green’, and I also decided to include a small ‘halt’ station – using the simple if attractive GWR ‘Pagoda’ Halt building, which will be ‘Upper Stowey’.
This will be a 4ft 6ins x 2 ft 6ins two layer layout. To keep the gradients low I have built to board so that the front is 30mm higher than the back to keep all the gradients gentle.
Unlike the ‘OO’ layouts(s) which have a wide variety of stock. I am planning the ‘N’ gauge layout to be purely GWR steam eta.
Whilst everything is on hold (And Inaccessible) during the building work I have been having a bit of a clear out on Ebay of ‘Surplus Stock’. Mostly LNER and BR MK2 Coaches.
I’m planning to use the funds to build a small ‘N’ gauge GWR layout to join the Burton Crumpnold Family. I had been thinking of having a go at an N gauge layout for a while. It all started for real when out local Oxfam shop had some GWR wagons. More on this later.